
Robot Arm Rigging Tutorial
For this tutorial i will be using Maya 8.5 it should work coherently with other versions of Maya aswell.
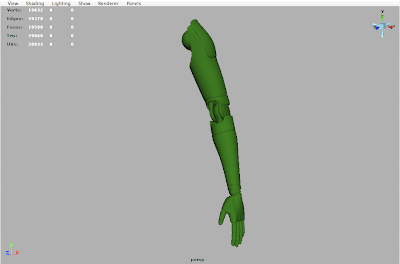
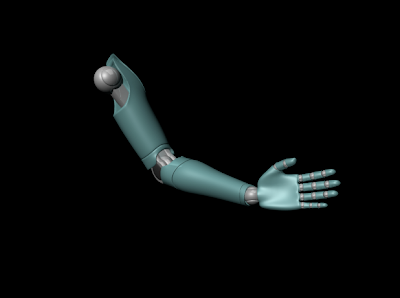
This tutorial is aimed at people who have a Robot type arm modeled already, as I will just be showing how to rig an arm that will allow the animator to animate the arm in an easy and clean way. As i want to achive purely robotic movements I will not be using IK or FK for this rig
1. Ensure you have deleted any history on your geometry.
2. The next step is to work out were you would like your joints placed in ur geometry. If you have modeled the actual joints into ur robot arm, this step is pretty easy. Press space bar and go into your side view. Make sure your in your Animation sub menu, and go to Skeleton > Joint Tool. Just roughly place your joint system for now.
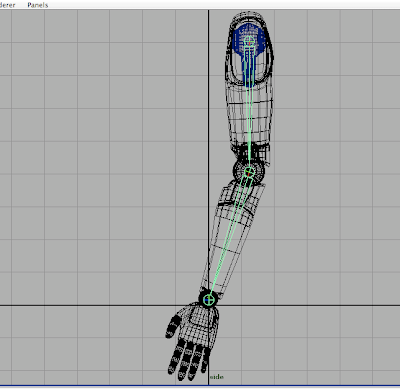
3. Once placed go back to your perspective view, you might notice your joint system needs moving. To move your joint system select the top joint as it is the orgin (the first joint you create) and use 'w' key to move your joint system so the top joint now lives inside the shoulder geometry.
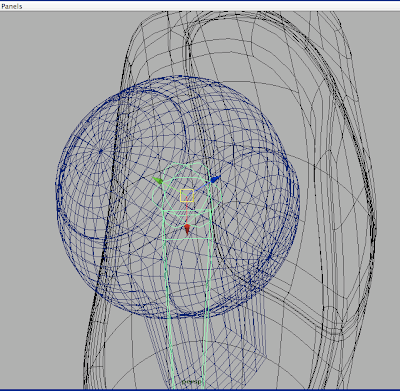
I would suggest showing the local rotation axes of your shoulder geometry, in my case i have a ball and socket type shape for my shoulder. To show the local rotation axes of a piece of geometry, select your geometry and go to Display > Transform Display > Local Rotation Axes. By doing this it shows you the centre of the geometry in my case it is helpfull as a I have a spherical shape. So now I can go to wireframe mode and select my top joint and by holding 'v' i can snap the top joint to the centre point of my geometry. (This step can be avoided, but it is helpfull if you want to be highly accurate). To stop showing the local rotation axes of an object just repeat Display > Transform Display > Local Rotation Axes.
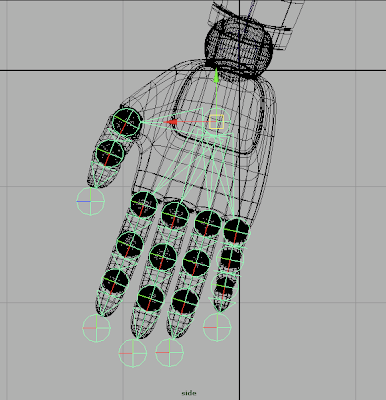
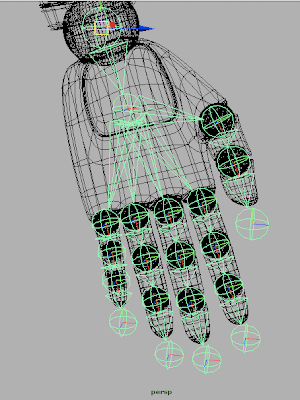
4. The next step is to move the next joints into place, to select a joint lower down the chain you can tap the arrow keys on your keyboard. Remember you don't want to rotate any of your joints just translate them into place. At this point im going to add some joints to the palm and fingers of my robot hand. Repeat the steps used above Skeleton > Joint tool and place your 1st joint at the centre of the palm of your hand and carry on adding joints to the pivot points of the thumb. Once happy with your palm - thumb joint system press enter.
The joint you created at the palm is the root joint . So to now add a system of joints to the fingers you select the joint tool again and place your 1st joint right at the centre of the root joint. This will select the root joint and allow you to carry on adding joints to the fingers, Repeat this until all your fingers have a joint system.
5. We now have to connect are palm 'root' joint to the 'wrist' joint, so to do this select the palm 'root' joint followed by the wrist joint holding shift then go to Skeleton > Connect Joint - Option Box, and select Parent Joint. If you now select the wrist joint and move it about you will notice it now controls the palm and finger joints. Make sure you undo any movements you just made throught testing the wrist movement. Next step is to translate the joints to the right places so all the joints fit inside your hand geometry.
6. Next step is to label all of your joints, starting from the shoulder joint down to the finger tip joint. Use a similar labeling method for example, LtShoulder, LtElbow, LtWrist etc (Lt meaning left) when you get to the fingers use a system similar to, LtIndex_a, LtIndex_b, etc for the index finger. Just try and keep your labeling consistent.
7. Next step is to parent and group your geometry, Think about each piece of your geometry has been manufactured which parts are connected? For example the finger tip and the finger tip ball joint would be connected. Group the finger tip to the finger tip ball joint, (to group press ctrl +g) then the finger tip group needs to be grouped to the next finger tip section and the next finger tip ball joint. Label your groups as you go. repeat this process untill your finger has been properly grouped, you will know by selecting your finger tip geometry and by tapping up on your arrow keys you can hop between your differnt groups. Once your finger has been grouped , group it to the palm geometry. Repeat this for all fingers and the thumb. So when you press up on your arrow key you will eventually have the entire wrist selected. repeat this all the way up the arm, group the wrist to the fore arm etc etc.
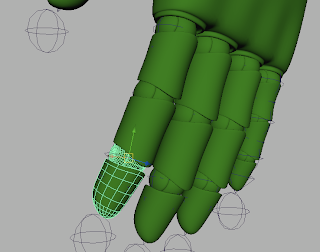
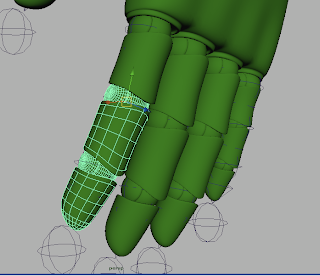
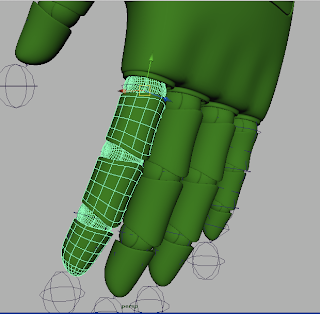
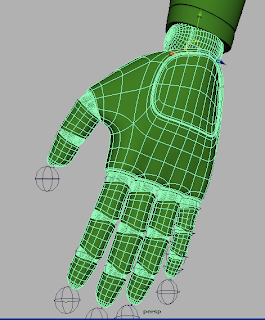
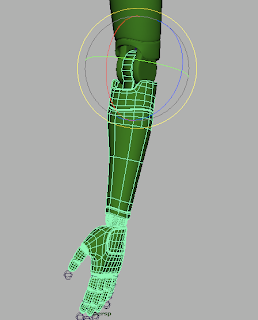
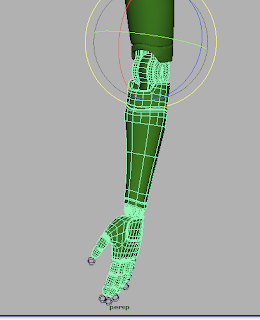
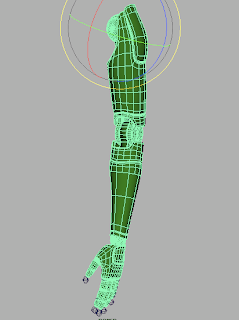
Each image shows a different group in the hierarchy.
8. By doing this it helps to keep everything organized. Now select your top group, and shift select your root joint (the origin joint) which should be the shoulder joint and go to Skin > Bind Skin.
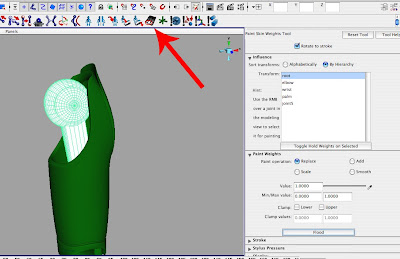
Now when you select a joint and move it your geometry will follow, remember to undo any movements you make while testing. Now we need to paint weight the geometry to the joints so we get no deformations. Select a piece of geometry i would suggest to start from the shoulder and work your way down. Once selected go to your animation shelf and select paint skin weights tool. (See picture below) once pressed go to the tools settings and select the relevant joint from the list, if you selected your shoulder geometry you will need to select the shoulder joint. scroll down in the options until you see a button called flood press this and you will notice your selected geometry go pure white. This means every thing that is white is now controlled by the joint you weighted it to. Repeat this process until all your geometry has been weighted to the correct joints. If you now have a play by rotating the joints you will notice you now get no deformation in your geometry :) Remember to undo any movements you make tho.
9. The next step is to create the control objects that the animator will use to animate the arm.
OK this section is kinda up to you creatively, you can either have a simple nurbs circle that you use to control a joint, or you could have a letter, anything! But the principle stays the same. I will use a simple nurbs circle. So create a nurbs circle by going to Create > Nurbs primitives > circle. The next step is pretty important so select ur shoulder joint and show its local rotation axes. Select your newly created nurbs circle and 'v' snap the cirlce to the local rotation axes of the shoulder joint. At this point scale your circle if you wish, then freeze transformations on your circle. So all the values = zero in your channel box. If you wish you can change the colour of your circle by going to its attributes by pressing ctrl +a, then select the nurbsCircle1 tab, scroll down to Display > Drawing Overrides > Enable Overrides > pick a colour. Name your circle.... LtShoulder_cc for example with the 'cc' standing for 'control curve'.
With your circle selected shift select your shoulder joint and go to Constrain >Parent constrain.
Your shoulder is now controlled by your LtShoulder_cc
Repeat the process for the elbow joint, but once your LtElbow_cc has been parented to your elbow joint, select your LtElbow_cc circle and parent it to your LtShoulder_cc by pressing 'p'. So when the shoulder is being moved by its control the elbow control will follow, repeat this for the LtWrist_cc but this time you would parent it to the LtElbow_cc. So the LtShoulder is the parent and the controls below it are the childs etc.
This wraps up the tutorial, I hope it has been helpful, This rig will allow the animator to move the arm in a robotic fashion by key framing the control curves. There are many ways you can develop this particular rig, you could use IK, FK you could add control curves to the fingers or add attributes to the wrist control so you can activate the fingers through attributes. You can be as creative as you like.
No comments:
Post a Comment